

24-hour national service hotline
Please contact us for further information
contact>>date:2017-08-21 09:38
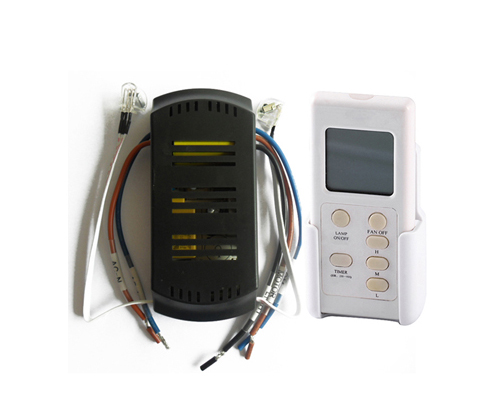
AS-CF236L ceiling fan remote control kit utilizes infrared control technology.
It consists of a remote control with LCD display and a rectangular shape receiver.
It is designed for easy installation and operation.
Good for all ceiling fans;
Two load outputs one for controlling the fan and another one for controlling the lights;
Three fan speeds;
Precise timer function;
LCD status display of fans lights and timer;
ABS-V0 flame resistance material and Elegant design and high quality build.
AS-CF236L ceiling fan remote control kit consists of two pieces as shown in Fig. 1
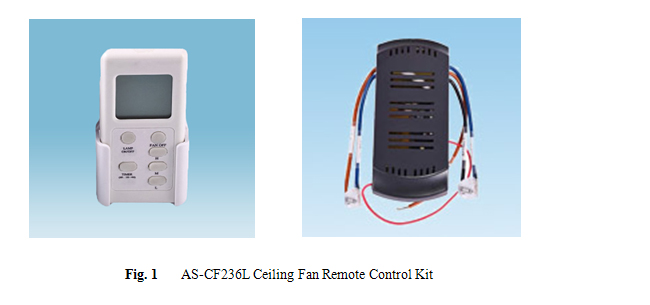
l An infrared remote control unit with a wall mount bracket; and
l A rectangular shape receiver that can receive control commands from the remote control
unit. This receiver uses existing wiring and can easily fit into the canopy of the ceiling fans.
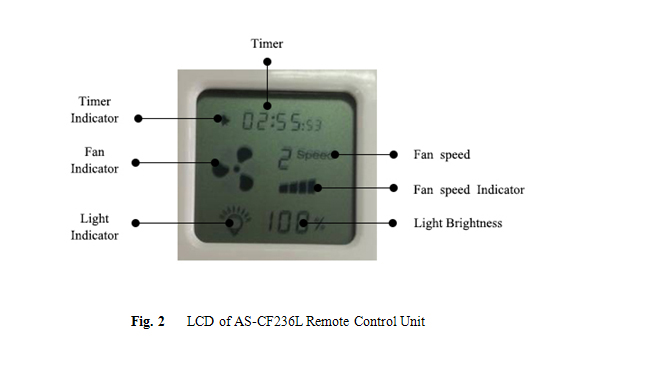
Fig. 2 is a large view of the LCD display of AS-CF236L remote control unit. The displayed
parameters include timer fan speed fan status and light status.
AS-CF236L remote control unit is battery driven and there is no wiring requirement. The receiver
has its all connection wires clearly labelled as shown in Fig. 3.
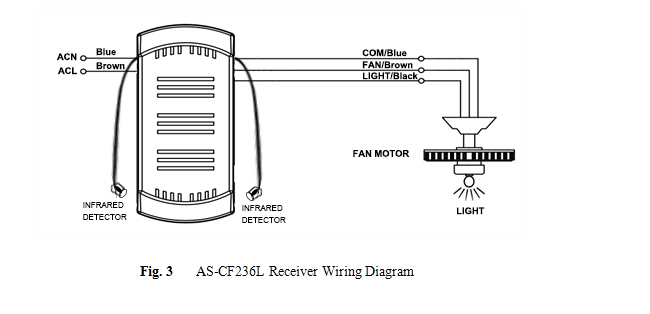
ACL: Connected to the hot wire of power supply
ACN: Connected to the neutral wire of power supply
LIGHT: Connected to the lights
FAN: Connected to the fan
COM: Connected to the neutral wire of the fan and/or lights
Warning: Please make sure power is turned off before starting installation!
Once properly wired the AS-CF236L receiver can be installed into the canopy of the ceiling fan
as shown in Fig. 4.
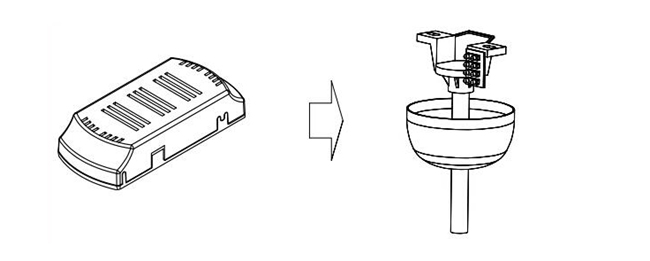

Note: The two infrared detectors should be arranged to face two orthogonal directions.
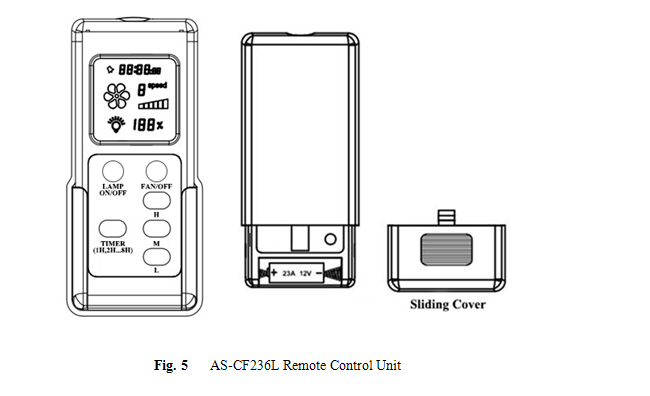
Fig. 5 shows the front and the back of the remote control unit. Before operating ceiling fan and
lights please complete the following two procedures:
a. The remote control unit uses one 23A 12V battery. Please open the sliding cover and
install the battery.
b. Turn on the power supply to the ceiling fan and lights. If there is another switch to
control the fan speed and the lights please set the switch to the highest fan speed and
turn on the lights.
Now it is ready to control the ceiling fan and lights using the remote control unit.
1. Turn on fan: The remote control unit has three buttons L M and H. Pressing each of these
three buttons will turn on the fan and se the fan to low speed medium speed and high speed
respectively. The fan indicator on the LCD display will be on the fan speed indicator will show
different height corresponding to the fan speed and the fan speed display shows the current fan
speed: 0 (off) 1 (low speed) 2 (medium speed) and 3 (high speed).
2. Turn off fan: Pressing the FAN/Off button will turn off the fan.
3. Turn on or turn off light: Pressing the Lamp On/Off button will turn on or turn off the
lights. When the light is on the displayed light indicator is on.
4. Set up timer: When the fan is on pressing the TIMER button will select four timer hours 1
hour 2 hours 4 hours and 8 hours respectively. Other customized timer hours can be made
available at factory. When the timer is activated the timer indicator is on and the timer starts
countdown. The fan will be turned off once the countdown timer runs out time.