

24-hour national service hotline
Please contact us for further information
contact>>date:2017-08-11 15:46


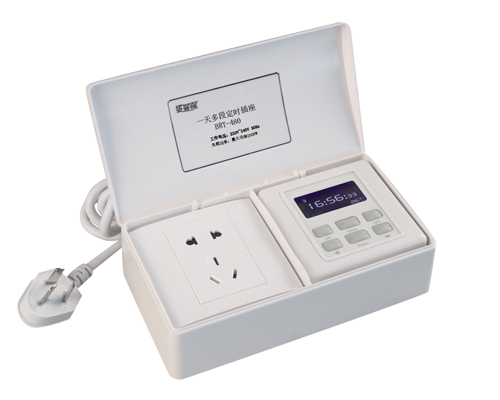
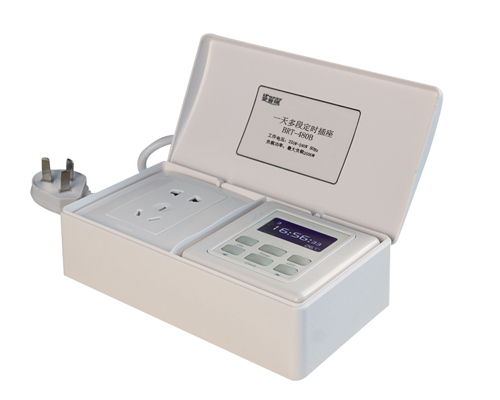
BRT-480 and BRT-480B are the most advanced timer sockets. They are controlled by a micro controller unit and have very accurate timing capability. It has an extension power cord and a socket for easy installation and operation.
BRT-480 has accurate timing setting to a second while BRT-480B has accurate timing setting to a minute.
Can be used as a portable device or a wall mount unit;
Up to 20 timing periods available within each day and memory function for the settings;
LCD display showing current time timing period # and next On time;
Manual control or automatic control available. User friendly front panel key pads for easy manual operation or automatic timing settings;
Load up to 2000W;
ABS-V0 flame resistance material; and
Classical 86 series design and high quality build.

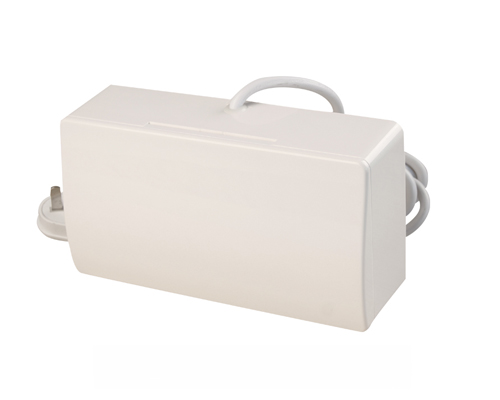
The device comes with a power cord on the back.
As shown in Fig. 3 the BRT-480 and BRT-480B timer sockets have an LCD display and 6 buttons in the front. The LCD display shows the clock time timing period # and the timer On time for the current timing period.

Fig.3 Front Control Panel and LCD Display
The 6 buttons are used to turn on/off the load and set clock time and timing settings.

When BRT-480 and BRT-480B are used as a portable device there is no need for further wiring installation. Once the power cord of BRT-480 or BRT-480B is plugged to a wall socket or extension cord it is ready to go.
When BRT-480 and BRT-480B are used as a wall mount unit the power cord can be removed and the unit is directly wired to power lines. Please find Wiring and Installation instructions as follows.
There are 5 wiring and installation steps (please refer to in Fig. 4):
Step one: Open the switch cover and use a screwdriver to pry off the front plates on lower edges;
Step two: Take off the screws to remove the bottom plate;
Step three: Take off the screws pointed by the red arrows to remove the cable clamp and the power cord that comes with the unit;
Step four: Insert the wires into the terminal blocks and tighten the terminal block screws; and
Step five: Reverse step 3 2 and 1 to reinstall the cable clamp the bottom plate and front plates. Finally close the cover.
1.Set up the clock:
1.1 Press the "Clock" button and hold for 3 seconds to enter the clock setup mode the hour display starts to flash; press "◀" or "▶" to adjust the hours (holding down "◀" or "▶" will adjust the hours quickly);
1.2 Press the "ALLOFF" button again the minute display starts to flash; press "◀" or "▶" to adjust the minutes (holding down "◀" or "▶" will adjust the minutes quickly); and
1.3 Press and hold the "Clock" button until clock display stops flashing. The clock settings are saved.
(Note: If there is no button operation for 15 seconds the clock settings will be automatically saved).
2.Set up timing period and duty cycles for auto recycling:
BRT-482 can automatically start recycling at preset time. Up to three recycling timing periods can be set up. Within each timing period up to five different duty cycle periods can be set.
Timing periods:
2.1 Set up the On time for timing period: Press and hold the "Timer" button for 3 seconds until the hour display starts to flash to enter timing period setup mode. Press "◀" or "▶" to adjust the hours (holding down "◀" or "▶" will adjust the hours quickly). Press the "ALLOFF" button the minute display starts to flash; press "◀" or "▶" to adjust the minutes (holding down "◀" or "▶" will adjust the minutes quickly); and
2.2 Set up the Off time for timing period: Once the On time for a timing period is set up press the "ALLOFF" button to set the Off time of the timing period. The hour display starts to flash and the right lower corner of the display shows “CL”. Press "◀" or "▶" to adjust the hours (holding down "◀" or "▶" will adjust the hours quickly). Press the "ALLOFF" button the minute display starts to flash; press "◀" or "▶" to adjust the minutes (holding down "◀" or "▶" will adjust the minutes quickly);
Once the timing period is set up proceed to set up the duty cycles. The longest available cycle time is 90 minutes and the shortest available cycle time is 5 seconds.
Duty cycles:
2.3 Press the "Timer" button to set the first On cycle time of the timing period. The minute display starts to flash and the left upper corner of the display shows “on1”. Press "◀" or "▶" to adjust the minutes (holding down "◀" or "▶" will adjust the minutes quickly). Press the "ALLOFF" button the second display starts to flash; press "◀" or "▶" to adjust the seconds (holding down "◀" or "▶" will adjust the seconds quickly); and
2.4 Once the first On cycle time for a timing period is set up press the "ALLOFF" button to set the first Off cycle time of the timing period. The minute display starts to flash and the left upper corner of the display shows “off1”. Press "◀" or "▶" to adjust the minutes (holding down "◀" or "▶" will adjust the minutes quickly). Press the "ALLOFF" button the second display starts to flash; press "◀" or "▶" to adjust the seconds (holding down "◀" or "▶" will adjust the seconds quickly);
Up to five different On cycles and 5 different Off cycles can be set up for each timing period in sequence. Repeat 2.3 and 2.4 to set up more cycles as desired.
Once the first timing period and its duty cycles are set up proceed to set up the On/Off time and On/Off cycles for the second timing period.
Once all the timing periods and their duty cycles are set up press and hold the "Timer" button until clock display stops flashing. The settings are saved. If there is no button operation for 15 seconds the settings will be automatically saved as well.
3.Manually triggered recycling:
BRT-482 can also start recycling anytime by pressing the “On” button. The duty cycle periods need to be set first by the steps as follows:
3.1 Right after setting up the clock time in step 1.2 press “Clock” button to enter manual recycling setup mode;
3.2 Follow step 2.3 and step 2.4 to set duty cycle periods as desired. Up to five different On cycles and 5 different Off cycles can be set; and
3.3 Once the duty cycles are set up press and hold the "Timer" button until clock display stops flashing. The settings are saved. If there is no button operation for 15 seconds the settings will be automatically saved as well.
The recycling process can be stopped anytime by pressing the “Off” button.
Delete settings
All the saved settings can be deleted by changing the settings to “--:--” by following the steps above.